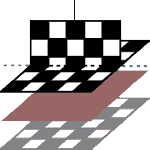
High-Contrast black and white mobile -- Updated with 8 new shapes!
| Black and white (greyscale) shapes: |
 |
 |
 |
 |
 |
 |
| Color shapes: |
 |
 |
 |
 |
 |
 |
| Outline only shapes: |
 |
 |
 |
 |
 |
 |
| Star (for hanging) |
 |
 |
|
You've probably read about the benefits of having high-contrast decor for
your newborn, but might have been put off by the purchase price of some commercial
products... Or maybe you just felt like making your own! You can make a mobile
with these shapes, or just cut them out and tack them to the wall or ceiling,
or use them to make a collage for your baby to look at in the car (glue shapes
to cardboard or fabric, pin to seat in front of baby). [Actually, since you end
up printing 4 of each individual shape and only use 3 for the simple mobile,
you can do both the mobile and the car collage!] there are black & white
and color versions. Be warned: these take a lot of ink, so I also put up some
that are just outlines of each shape. You can print these out and color them
yourself in whatever colors you like!
Materials needed:
- Two copies each of desired shapes (click at right for large, printable versions)
- Cardboard, either corrugated from a box, or brown from a cereal box; or,
if you want to get really fancy, foam board (I used the sticky-sided kind for
the mobile in the picture below)
- For the simple version, you'll need about two 8.5 x 11" sheets' worth
of cardboard.
- If you make the "involved" version, you will need about four sheets'
worth.
- Or, you can print the shapes on cardstock -- this is sufficient in non-humid
areas.
- Glue: I like "Mod Podge" type products, as you can spread them
really quickly with a foam brush. Any white glue is fine, though; double-sided
tape would work well, too. If you're in a hurry, staples are fine!
- Scissors, or craft knife and straightedge ( the latter is faster but more dangerous!); if you have some kind of paper cutter, that's even faster for the square shapes. Circular shapes are a little easier to cut with scissors.
- Between 30 minutes and 3 hours' time -- if you have a brush for glue and
a paper cutter, it will go faster than if you are doing everything with scissors
and simple white glue. Staples are even faster!
Instructions:
Print
out the shapes, two copies of each sheet, and one of the large star.
Lazy version:
 Cut
out one of each small shape and paste or staple it to cardboard, then cut the
cardboard into the proper shape.
Cut
out one of each small shape and paste or staple it to cardboard, then cut the
cardboard into the proper shape.- Using the other copy, fold the touching shapes together, then in half
upwards, so that you have a t-shape.
- Glue or staple the t-shape to the other side of the appropriate cardboard
shape. (Skip this step if using cardstock)
- Tape a piece of thread to the top of each of the four shapes, or sew through
the shape with needle and thread.
- Glue or staple the large star shape to a piece of cardboad, and tape or sew
thread to each corner, making a thread pyramid to hold this piece horizontal.
- Tape or sew the smaller shapes' threads to the corners of the big square
( the one with the star printed on it).
- You could use all 12 if you wanted a really
crowded mobile...
- just use the simple shapes (for a younger infant)...
- or the complex
shapes or the character shapes (for older infants).
- Hang and enjoy!
More involved (but
prettier) version, shown at right:
 Cut out two of each small shape, and glue them to both sides of a piece
of cardboard (you may have to glue one on, cut the shape out, then
glue on the other).
Cut out two of each small shape, and glue them to both sides of a piece
of cardboard (you may have to glue one on, cut the shape out, then
glue on the other).- Cut out the other two of each small shape and repeat the above, but
leave a pair of tabs at one edge.
- Glue the tabs to one side of the other corresponding shape, making a
t-shape that has full versions of each shape on each face.
- Thread through the top of each one, and follow from step 5 above.
Hang above baby's changing table or crib (if s/he has one). This has amused
Stephen since he was about 4 weeks old, and he's now 13 weeks and still enjoys
it.
other versions on the web:
Here's
a very clever one by a dad that includes step-by-step assembly photos.
All content, barring that which is otherwise attributed, is ©2023 to
Jan Andrea. If you wish to use my content on another page, please email before
doing so, even for content with the Creative Commons licenses. Text/images used
elsewhere must be attributed to me. Be advised that I will pursue copyright
violations.


 Cut
out one of each small shape and paste or staple it to cardboard, then cut the
cardboard into the proper shape.
 Cut out two of each small shape, and glue them to both sides of a piece
of cardboard (you may have to glue one on, cut the shape out, then
glue on the other).