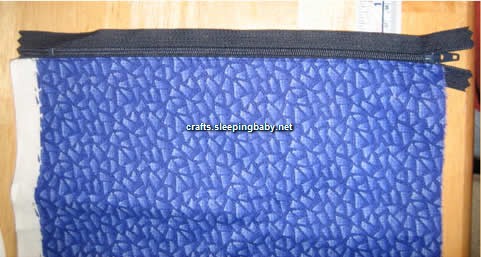
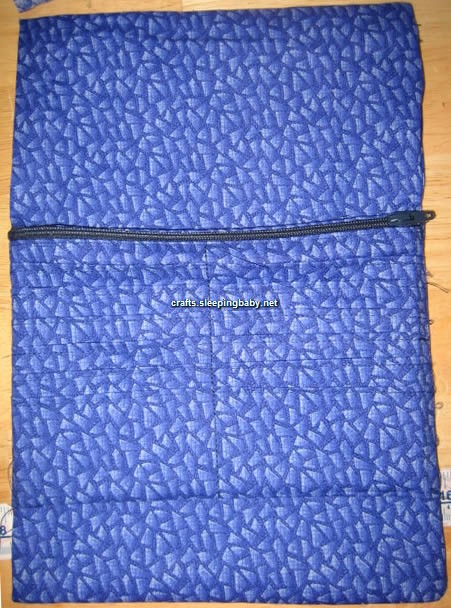
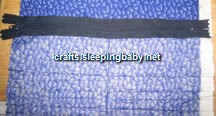
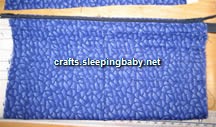
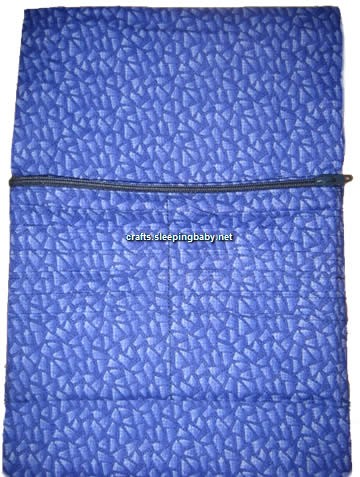
| 1. Sew a zipper to one short edge of the 40" by 8" piece --
well, half a zipper, since the other end will be sewn on in step 5. I use
a zipper foot to sew it on, but you can just press the edge and then topstitch
if you want. Shown at right is the zipper which has been stitched right-sides-together,
then topstitched -- I wanted it to look nice. |
 |
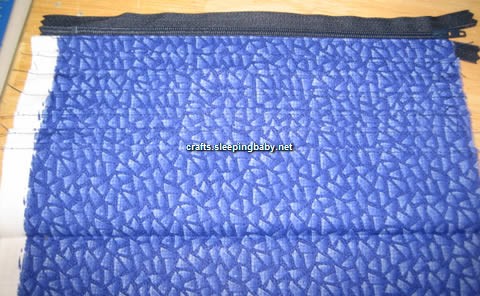
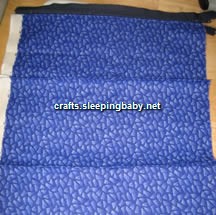
| 2. This part is a little weird. To make the pockets look nice
and neat, I topstitched the top edge of each one. This basically meant marking
the fabric at 4 " intervals, starting at the zippered end, then folding
(wrong sides together) at the marks and stitching about 1/8" from the fold
line. You could also just press the folds; they'll be sewn in later. Two of these
folds are shown at right -- they're not easy to see in the thumbnail picture
(click for larger), but each is visible as a small ridge in the larger version.
If you were to use a striped fabric that had a 2" repeat, this would be
particularly easy. You can make more or fewer folds, depending on how many card
pockets you want; I have 7 folds, which makes 6 rows of pockets, or 12 pockets
total. If you didn't mind a taller wallet, you could have as many rows as your
fabric's length allowed; each pocket takes up a bit less than 4". |
 |
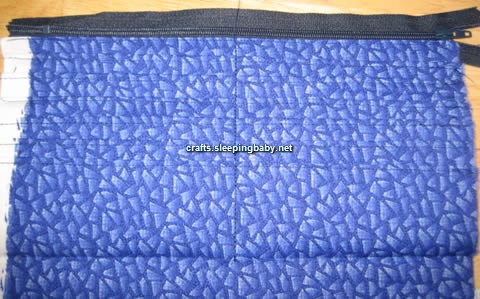
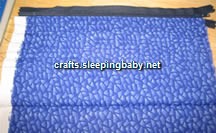
| 3. To make the pockets themselves, pull each fold up towards
the zipper, leaving about 1/3" between that fold and the previous one, as
shown at right (once again, easier to see in the larger version). ( the pattern
on my calico fabric happens to have a 1" repeat, so the folds each show the same
portion of the pattern when they're stacked up like this.) It's helpful to put
a pin in, every few folds, just to keep these in place, or a piece of tape vertically
across the folds. |
 |
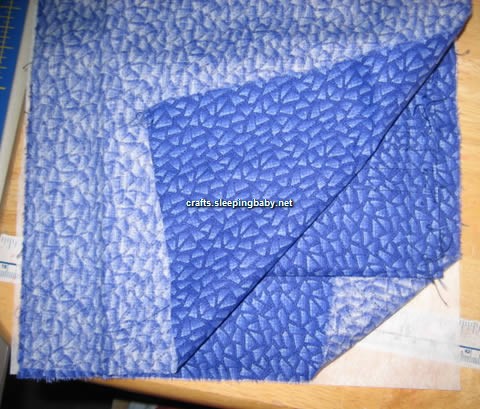
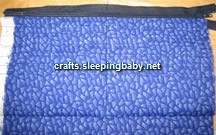
| 4. Next, I sewed a straight line in the middle of the unit,
starting just below the zipper and stopping at the last pocket -- there is more
fabric left over at the bottom, which will be used in the next step. I'm starting
to think I should have used white fabric and black thread for these directions,
but the larger version shows it a bit better. It's helpful to baste the sides,
too, just to keep everything straight and in place. |
 |
| 5. Here's where I sew the other half of the zipper. Using the
fabric that's left at the bottom of the folds -- should be at least 6", depending
on the depth of your folded section -- I folded the excess over the pockets,
right sides together. The view at right shows the back of the pockets, as the
zipper is sewn in. |
 |
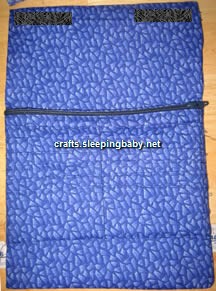
| 6. Now trim any extra fabric from the zipper, and turn the pocket
section right-side-out through one of the open sides. You can see how the zipper
now forms a pouch (albeit one that's currently open on the sides) which will
later become the coin pocket. |
 |
7. Time to sandwich the pocket section with the lining, interfacing,
and outside piece. Shown at right, the outside is on top (right side down), followed
by the pocket section (right side up), lining (right side up) and interfacing.
(I'm sorry about the single fabric color use -- these directions would be a lot
clearer with multiple colors, I know!) the pocket section should be about 2"
from the bottom of the stack; the bottom part will have the hook-and-loop tape
attached to it for a closure. If you want a wrist strap, make a tube about 1/2"
wide and roughly 8-10" long (depending on your wrist size), fold it in half,
and tuck it into the sandwich between the lining and the pocket section.
Stitch around the edges, using about a 1/2" seam allowance on the longer edges;
can be narrower or longer on the short edges, as you prefer. (If you basted the
sides of the pocket section, make sure your stitching covers those lines.) Leave
a small gap for turning somewhere -- I left mine at the middle of the top edge.
This will be closed during topstitching. |
 |
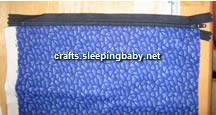
8. Turn the wallet right-side-out through the gap. Topstitch
around the edges, catching the gap to close it. Watch out for the zipper -- your
machine will probably go through nylon coils, but the needle will certainly break
if you hit a metal portion.
there will be openings behind the pocket section at the top and the bottom.
Topstitch the bottom one closed (I think that's easier to see in the larger version
of the picture at right). This leaves an opening for bills and coupons at the
top of the pocket section, as well as the zippered portion for coins and other
small stuff.
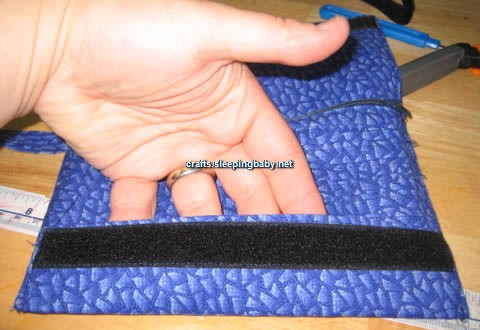
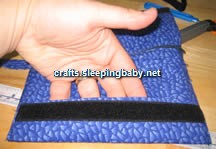
Sew the hook and loop tape to the very top edge. I used an 8" long piece,
which ended up being a little too secure -- it's hard to open the wallet! I think
two shorter pieces, one on each side, would be sufficient -- I added those in
my image processing program so you can see where they would go. The other side
of the tape will go on the "front" of the piece that's below the pocket section,
since it's folded upwards when finished (see next step). |
 |
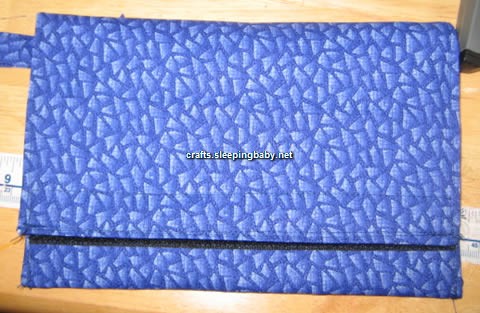
| 9. This shows the bottom section with the hook-and-loop tape
on that bottom part, which is folded upwards and stitched down at the edges to
make a little pocket for a pen. Unfortunately, a piece of h&l tape that long
made it quite difficult to open -- I have to really pull to open in. That makes
it secure, but annoying. Two smaller pieces, as shown in step 8, are a better
compromise, I think. |
 |
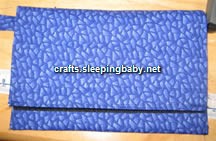
10. Here is the wallet all folded up and finished. You can see
a bit of the wrist strap on the left -- I actually forgot I wanted it until after
I'd completed step 7, so I had opened the stitching and pushed it in from the
outside, then topstitched it in -- what would I do without a stitch ripper?
I've been using this wallet for a couple of months now, and if I do say so
myself, it's the handiest one I've ever had. It's a lot bigger than what I usually
prefer to carry, but since it's so flat, it fits nicely in all of my bags.This
would be a good companion to the "lite" diaper bag/purse, as it would fit in
the back flap pocket. |
 |
 I'm
on a constant quest for the perfect purse and the perfect wallet. Of course,
since my "needs" seem to change on a daily basis, it's a quest that is destined
to go unfulfilled, but it's a fun quest, so I don't mind. I've made quite a few
bags, and after trying oodles of purchased wallets, all of which either didn't
have enough room for my various cards (credit, store loyalty, medical, etc.),
I decided to try to make my own. Well, I couldn't find a pattern on the web for
what I wanted, either, so here's my version. I've been using this wallet for
a couple of months now, and if I do say so myself, it's the handiest one I've
ever had. It's a lot bigger than what I usually prefer to carry, but since it's
so flat, it fits nicely in all of my bags.This would be a good companion to the "lite" diaper
bag/purse, as it would fit in the back flap pocket.
I'm
on a constant quest for the perfect purse and the perfect wallet. Of course,
since my "needs" seem to change on a daily basis, it's a quest that is destined
to go unfulfilled, but it's a fun quest, so I don't mind. I've made quite a few
bags, and after trying oodles of purchased wallets, all of which either didn't
have enough room for my various cards (credit, store loyalty, medical, etc.),
I decided to try to make my own. Well, I couldn't find a pattern on the web for
what I wanted, either, so here's my version. I've been using this wallet for
a couple of months now, and if I do say so myself, it's the handiest one I've
ever had. It's a lot bigger than what I usually prefer to carry, but since it's
so flat, it fits nicely in all of my bags.This would be a good companion to the "lite" diaper
bag/purse, as it would fit in the back flap pocket.